
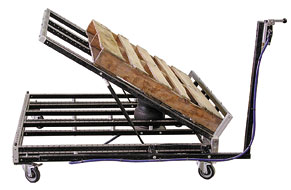
Assembly ease – with less tools, fewer components and pre-punched holes for quick measuring you can build perfectly square systems much quicker than other products available on the market.
All the strength of a welded structure and signification reduction in assembly time = SAVINGS!
Tips For Simple Assembly
1) Cutting Tubing To Length.
- Tube end must be cut perfectly square.
- Dimension from center line of first hole to cut end must be .625 inches.
- Use Lifetime Systems #L-CJ1 precision cutting fixture to insure proper cut on end of tubing.
- Insert Ø5/16 pin through fixture locating hole and tube for proper alignment.
- Hand file to debur ends.
- Touch-up cut ends with black permanent marker for finished appearance.
- Turn remaining piece of tubing around, locate in fixture and remove end hole if piece is to be saved for later use. The saw blade width cut is enough to create problems with remaining piece without this process.
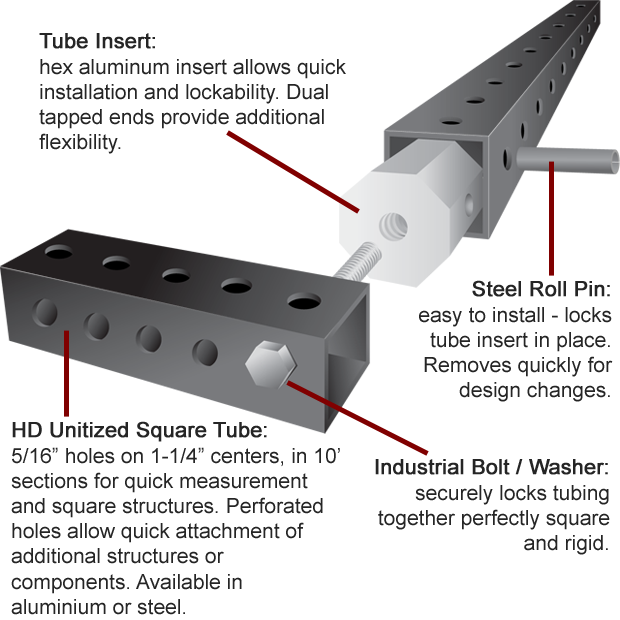
2) Insert Lifetime #L-TI1 standard tube insert. (not #L-T13 insert).
- Check that the insert is tapped through.
- Put insert in end of tube & line up holes for rollpin.
- Remember to place direction of hole in a direction that you will have access to add or remove pin once the frame is assembled.
- Insert end should be about 1/32″ into the tubing end. Allowing tubes to be pulled tightly together when assembled.
3) Insert Lifetime #L-RP1 Ø5/16 x 1 1/4″ long roll pin through both tubing & insert.
- Use Lifetime #L-RPT1 roll pin insertion tool and ball peen hammer to drive in pin.
- Roll pin must be flush on both sides of the tube surfaces. This is critical to insure integrity of the joint.
4) Insert Lifetime #L-TI6 tube end support block.
- Insert block to keep tubing from being crushed by over tightening bolt.
- Insert block flush with end of tube. Be careful not to drop support block down the tube. A bolt inserted into the next hole will prevent block from sliding down inside of tube.
- Support block finishes off end nicely.
- Plastic cap #L-C1 will not be needed with support block #L-TI6.
5) Bolt Lifetime #L-175 (5/16-18 x 1 3/4 hex bolt) through tube and into Lifetime Systems #L-TI1 standard tube insert.
- Always use 5/16 flatwasher on bolt to prevent bolt from contacting roll pin. Contact with roll will create a loose joint, being detrimental to the stuctural integrity and may allow bolt to loosen over time.
- May use Lifetime #L-TI6 tube end support block in end of tube to keep tube from from being distorted by over tightening bolt, especially with aluminum extrusion.
- Bolt should go all the way through washer, tubing, support block and threaded into standard tube insert.
- Maximum bolt torque for steel tubing (10 lbs. sq. inch)
- Maximum bolt torque for aluminum tubing is (5 lbs. sq. inch)
6) Press on Lifetime #L-C1 tube end cap.
- End cap will not be needed if #L-TI6 tube end support block is used.
- When inserting plastic tube end cap on, use soft mallet or dead blow hammer, as to not damage cap or tubing.